Receive and Test Incoming Webhooks in an ASP.NET Core Minimal API: A Comprehensive Guide
 Christian Findlay
April 02, 2023
7 min read
Christian Findlay
April 02, 2023
7 min read
Introduction
ASP.NET Core Minimal APIs is a lightweight approach for building web APIs with minimal boilerplate code. An ASP.NET Core minimal API is a great approach for building web APIs that receive incoming webhook POST requests because there is minimal ceremony to get an app up and running. If you’re looking for a place to host your webhook service, read my article on Google Cloud Run.
In this blog post, I will walk you through creating an ASP.NET Core Minimal API application that accepts incoming webhook POST requests and responds accordingly. You will also learn how to test that the API receives webhook POST requests.
If you want to skip ahead, you can grab the full sample here.
Prerequisites:
- Familiarity with C# and ASP .NET Core
- A basic understanding of webhooks
- Visual Studio, JetBrains Rider, or Visual Studio Code installed with the .NET 7 SDK.
- Optional: Installation of ngrok to do a full end-to-end test from the source webhook to your local web API
Building The App
Step 1 - Create the Project
Create a new ASP .NET Core project using the .NET CLI or your IDE, such as Visual Studio.
dotnet new web -n MinimalWebhook
Navigate to the newly created project folder and open the Program.cs file. Remove any existing code and replace it with the following:
//This is an ASP .NET Core Minimal API that receives Webhook POST data
using System.Text;

var builder = WebApplication.CreateBuilder(args);

//Configure services
builder.Services.AddSingleton<IReceiveWebhook, ConsoleMinimalWebhook>();

var app = builder.Build();

app.UseHttpsRedirection();

//Listen for POST webhooks
app.MapPost("/webhook", async (HttpContext context, IReceiveWebhook receiveWebook) =>
{
    using StreamReader stream = new StreamReader(context.Request.Body);
    return await receiveWebook.ProcessRequest(await stream.ReadToEndAsync());
});

app.Run();
Step 2 - Create the IReceiveWebhook Interface
Create an interface called IReceiveWebhook that defines a method for processing the POST request data received from webhooks. This interface will allow you to create different implementations for handling received webhook data. It also allows us to verify that the endpoint calls your business logic when it receives a POST.
public interface IReceiveWebhook
{
    Task<string> ProcessRequest(string requestBody);
}
Step 3 - Create the ConsoleMinimalWebhook Implementation
Create an implementation class called ConsoleMinimalWebhook that implements the IReceiveWebhook interface. This basic implementation writes the POST request body to the console and returns a JSON response. You should replace this with your business logic in a real-world scenario.
/// <summary>
/// An implementation for IReceiveWebhook that writes to the console
/// </summary>
public class ConsoleWebhookReceiver : IReceiveWebhook
{
/// <summary>
/// Writes the POST request body to the console and returns JSON
/// </summary>
public async Task<string> ProcessRequest(string requestBody)
{
//This is where you would put your actual business logic for receiving webhooks
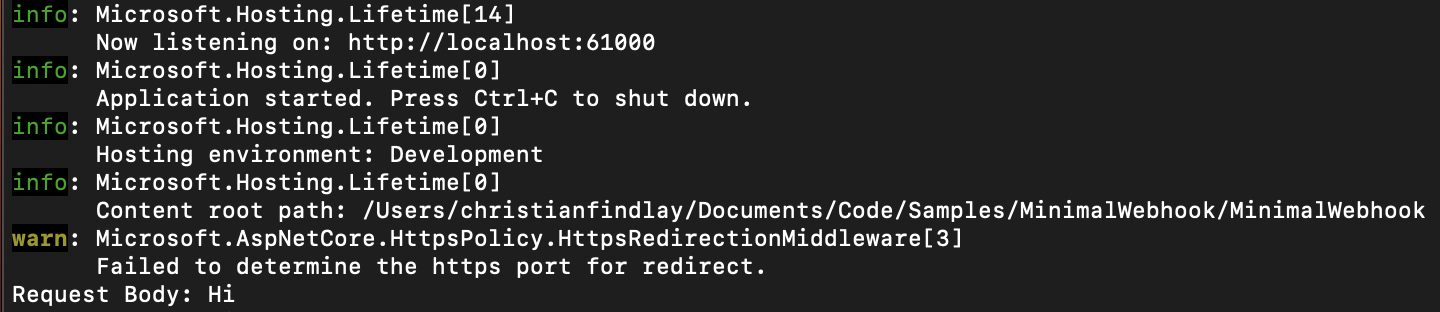
Console.WriteLine($"Request Body: {requestBody}");
return "{\"message\" : \"Thanks! We got your webhook\"}";
}
}
That’s all you need. You now have a working endpoint that can receive POST data on the path webhook. Check the full code here.
You can use a tool like Postman, curl to send a POST request to your API’s “/webhook” endpoint. You should see the webhook payload printed in your console and receive a JSON response with the message “Thanks! We got your webhook.”
Testing
Overview
We will test the API endpoint by running the server and then receiving a webhook. We will use ASP .NET Core Integration Testing to verify that we can receive the webhook. This test proves that your endpoint can receive incoming webhook posts. This test doesn’t seek to prove that the business logic of your app is correct. You can test that separately. This only tests the HTTP wiring between the webhook sender and your Web API.
Step 1 - Create a Test Project and Install NuGet Packages
Create an xunit test project in your solution and ensure it has these NuGet packages.
- Microsoft.NET.Test.Sdk
- Microsoft.AspNetCore.Mvc.Testing
- xunit
- xunit.runner.visualstudio
Add a reference to the Webhook project that you created earlier.
Step 2 - Create a Fake Implementation of IReceiveWebhook
Create a new class FakewebhookReceiver that implements the IReceiveWebhook interface. We use this fake implementation to track incoming webhook calls during testing and respond with a message:
public class FakewebhookReceiver : IReceiveWebhook
{
    public List<string> Receipts = new List<string>();

    public async Task<string> ProcessRequest(string requestBody)
    {
        Receipts.Add(requestBody);

        return "Hello back";
    }
}
Step 3 - Add This Helper Method
This helper method spins up a test server that allows us to intercept messages coming from the webhook sender:
/// <summary>
/// Spins up a test server and allows us to configure the server with test doubles
/// </summary>
private async Task WithTestServer(
    Func<HttpClient, IServiceProvider, Task> test,
    Action<IServiceCollection> configureServices)
{
    await using var application =
        new WebApplicationFactory<Program>().
        WithWebHostBuilder(builder =>
        {
            builder.ConfigureTestServices(services => configureServices(services));
        });

    using var client = application.CreateClient();
    await test(client, application.Services);
}
Step 4 - Add The Test
This tests that your endpoint is receiving POST messages and is responding with the message received when it calls ProcessRequest.
[Fact]
public async Task TestReceivingWebhook()
{
    var fakeReceiver = new FakewebhookReceiver();

    await WithTestServer(async (c, s) =>
    {
        var response = await c.PostAsync("webhook", new StringContent("Hi"));

        Assert.Equal(HttpStatusCode.OK, response.StatusCode);

        var responseText = await response.Content.ReadAsStringAsync();

        //Verify we got the expected response
        Assert.Equal("Hello back", responseText);

        //Verify that we received the correct details from the webhook
        Assert.Equal("Hi", fakeReceiver.Receipts.First());

    }, s => s.AddSingleton((IReceiveWebhook)fakeReceiver));
}
If you’re struggling with the API or the tests, try cloning the Samples repo and opening the solution in the MinimalWebhook folder.
Step 5 - Hit The Endpoint
This test hits the locally running endpoint on port 60000.
[Fact]
public async Task TestLiveWebhook()
{
    var client = new HttpClient();
    var response = await client.PostAsync("http://localhost:60000/webhook", new StringContent("Hi"));
    var responseBody = await response.Content.ReadAsStringAsync();
    Assert.Equal(HttpStatusCode.OK, response.StatusCode);
    Assert.Equal("{\"message\" : \"Thanks! We got your webhook\"}", responseBody);
}
To run this test:
- Ensure the launch config is configured for HTTP 60000
- Rebuild the solution
- Open the command line and navigate to the test project folder
- Run the command
dotnet test - Run the test above. You should see this:
You can also use something like Postman to send a POST request to your API’s “/webhook” endpoint to verify that the test is working.
Step 6 - End to End Test With ngrok (optional)
Ultimately, you want to test the webhook end to end. That means that the original service such as GitHub sends a webhook to your service. You can use ngrok to tunnel the webhook call to your local machine. Ngrok acts as a proxy for your service on the web and then tunnels the webhook to your computer. The service will send a message to a temporary ngrok URL, and ngrok will pass that message to your local service. See the ngrok documentation for further details.