.NET - How to Sign an Assembly in Visual Studio 2019
 Christian Findlay
January 25, 2020
3 min read
Christian Findlay
January 25, 2020
3 min read

Signing an assembly ensures that the consumer knows its origin and uniquely identifies the component. It makes the physical DLL file tamper-proof. This tutorial will step you through signing an assembly with a strong name key (SNK) in .NET. It is straight forward in Visual Studio 2019, but there are some pitfalls to consider. This tutorial will target .NET Standard, but the concept is the same for other target platforms. This tutorial is is backward compatible with some Visual Studio versions.
- Create a .NET Standard Class Library in Visual Studio.
- Right-click on the project and go to properties
- Click on the “Signing” tab
- Check the “Sign the assembly” checkbox
- Use the drop-down list to select an existing SNK, or create a new one. The file type is .pfs
- If you create a new .pfs, it is critical to create a strong password. Use a trusted password manager to generate a long password and store it.
So far, so good. You should be able to compile at this point, and the assembly has an SNK. However, there are a few things to note.
Firstly, when you clone the repo with this project on to a fresh computer, it is going to ask for the SNK password. It should only prompt you once. However, it can give you a non-descriptive compilation error message. When this happens, click on the “Change Password” button, enter the password in the old password textbox, and do the same for the other two. I have no idea why this fixes the problem, but it has done so since the dawn of time.
Secondly, please note that signing an assembly in Visual Studio will cause the build to fail in pipeline builds. Signing in pipelines is outside the scope of this article. In the case of a pipeline build, you should follow the steps to configure the signing as a part of that process.
Lastly, signing an assembly makes it unusable for open source repositories. If you turn on signing, others will not be able to compile the assembly unless they know your password or turn off signing. There is a good workaround. You can turn off signing for the “Debug” configuration. That means that by default, the assembly won’t have an SNK. Developers will be able to compile your project after they download the repo, and you will still be able to sign the assembly in the release config.
Turn Off Signing On Debug
- Open the .csproj file in Visual Studio Code. It will look like this.
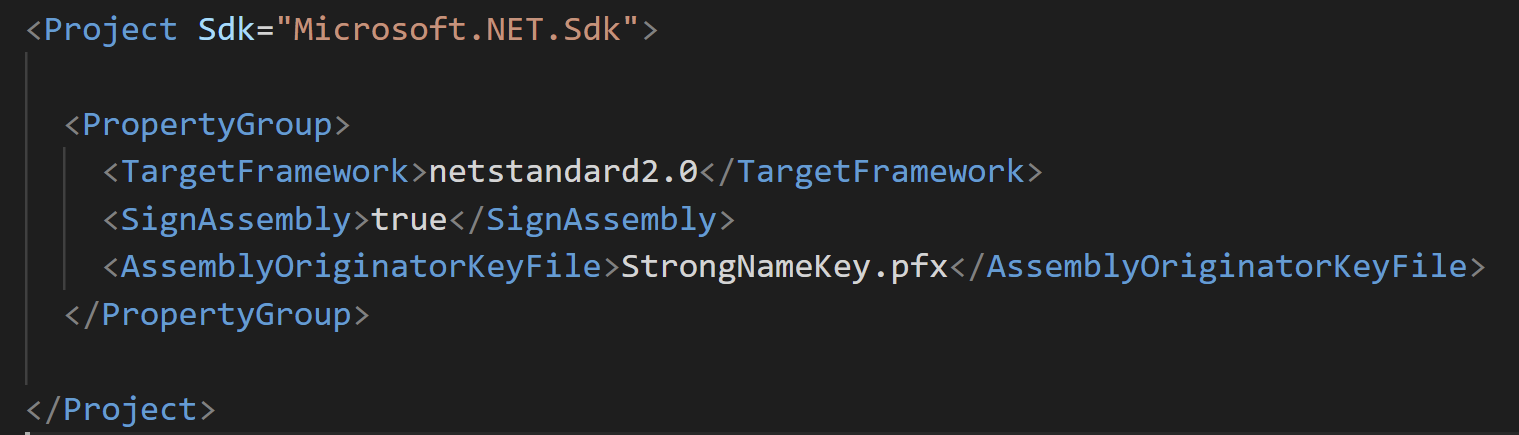
- Find the sections related to signing (SignAssembly, AssemblyOriginatorKeyFile) and delete those lines.
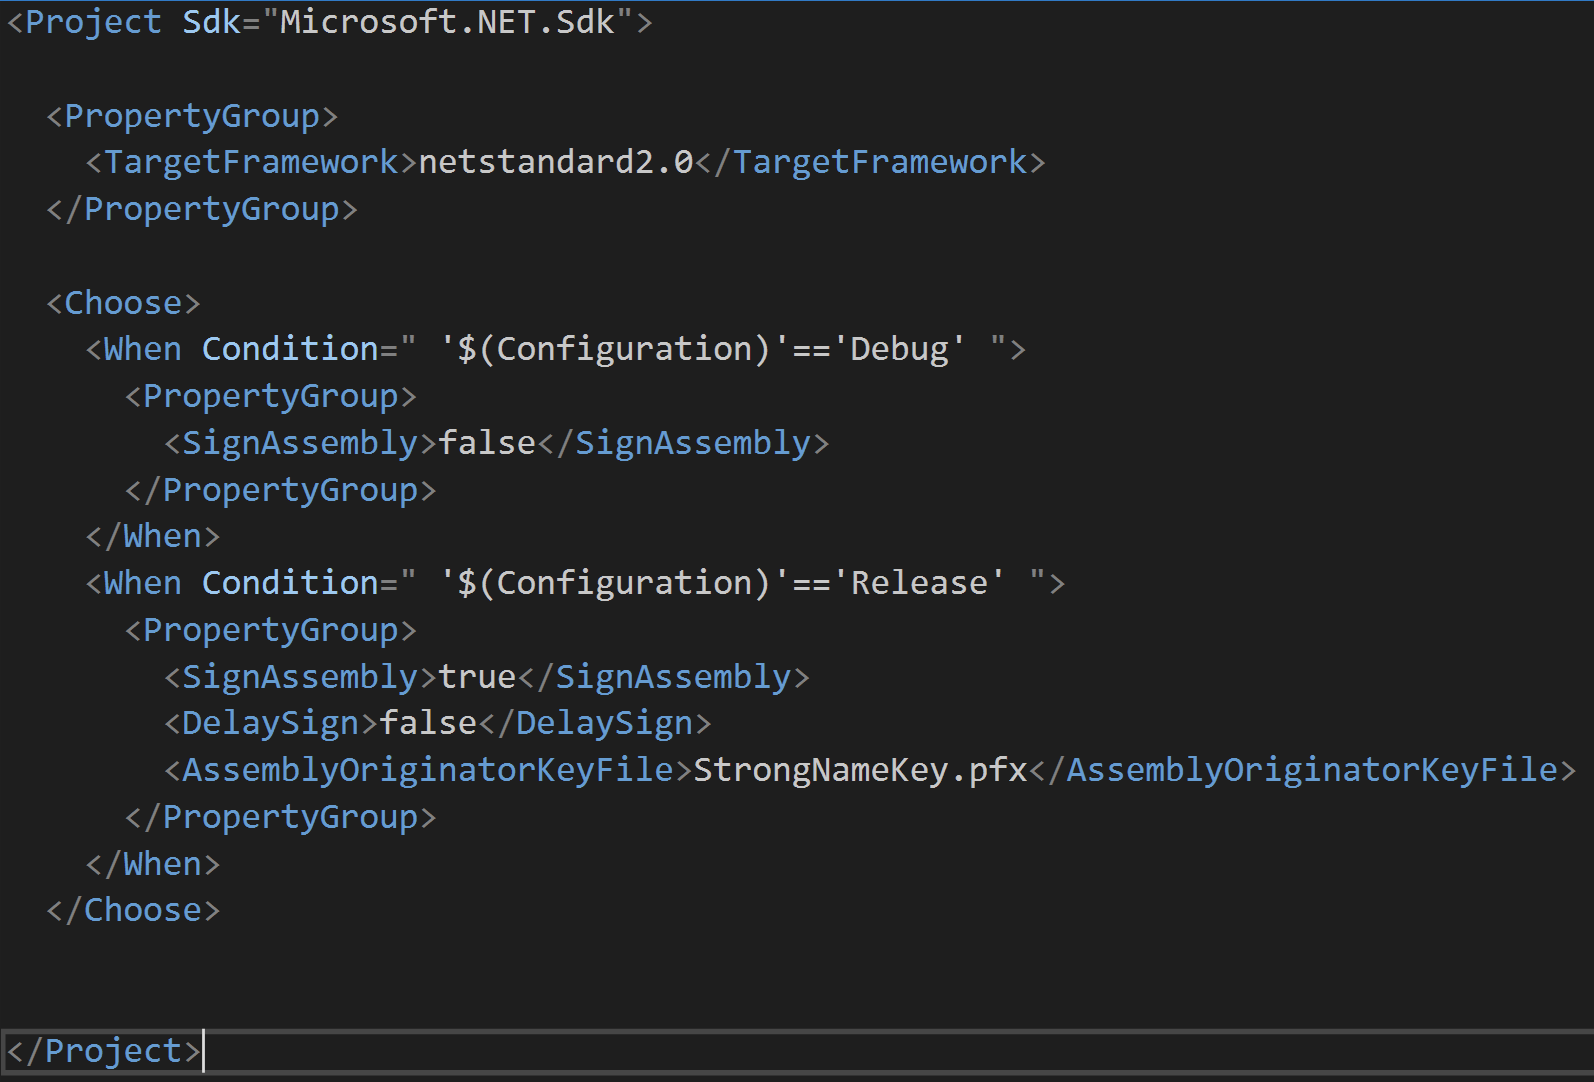
- Add this Choose block after the PropertyGroup but inside the Project
<?xml version="1.0" encoding="UTF-8"?>
<Choose>
   <When Condition="'$(Configuration)'=='Debug'">
      <PropertyGroup>
         <SignAssembly>false</SignAssembly>
      </PropertyGroup>
   </When>
   <When Condition="'$(Configuration)'=='Release'">
      <PropertyGroup>
         <SignAssembly>true</SignAssembly>
         <DelaySign>false</DelaySign>
         <AssemblyOriginatorKeyFile>StrongNameKey.pfx</AssemblyOriginatorKeyFile>
      </PropertyGroup>
   </When>
</Choose>
You can see a working example from RestClient.Net here. You should be able to download and compile this project as a reference.
Wrap Up
Signing your assemblies with an SNK is a good idea, but it’s important to test the outcome. You don’t want to ruin your open source repo and confuse people who might otherwise contribute to your library. Make sure that others in your team/community can use the project after the change.